Water purification methods
Produce sodium hypochlorite by electrolysis
The sodium hypochlorite is a very useful disinfectant, widely used in various contexts, especially for water purification. It’s easy to produce it if you have electric power. It is possible to produce sodium hypochlorite to about 5% by electrolysis.
ATTENTION:
The transaction must take place outdoors or in a very airy place because of dangerous chlorine gas that develops.
In order to let the electrolytic process take place, it is necessary a plastic container of 1.5 - 2 liters, a source of DC power that is able to deliver at least 6 Volts at 1 Ampere (one 12V battery for cars is fine, or a solar panel), as well as a carbon electrode for the anode (it is possible to use mines for pencils, made of graphite). For the cathode* it’s possible to use directly the copper wire. The surface of the electrodes must be as wide as possible.
*NOTE:
For long operative periods, it is better to make also the cathode with graphite, to avoid corrosion problems.
With one liter of water, one hand of salt and 2 hours of electric power at 12V from a battery, you can have 1 liter of solution with sodium hypochlorite.
With a 12 Volts battery you can make a fast electrolysis, but if you need to produce chlorine off-grid, it can be useful to use a solar panel.
Electrolysis Process
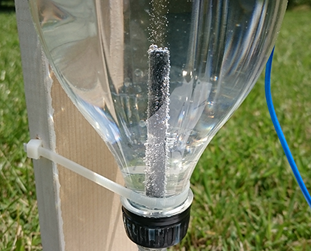 ANODE: carbon electrode (mines for pencils) |
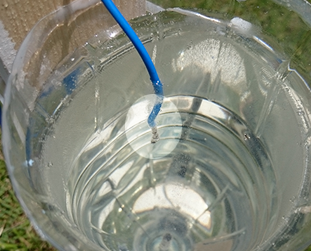
CATHODE: copper wire* |
Checking Chlorine Concentration
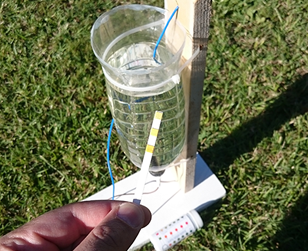 Chlorine Test Strip |
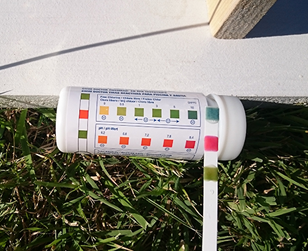
Chlorine Test Results |
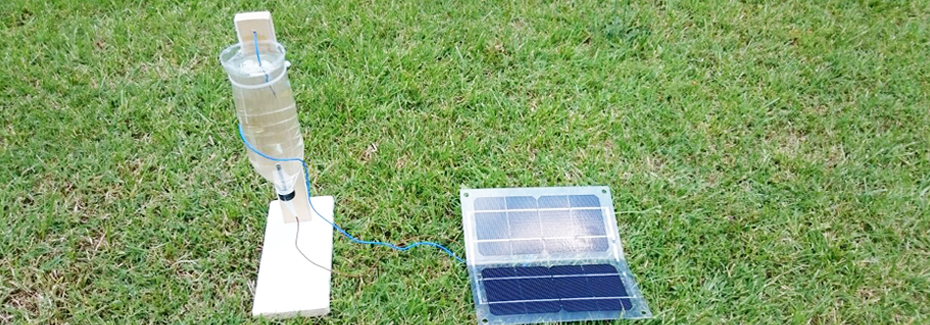
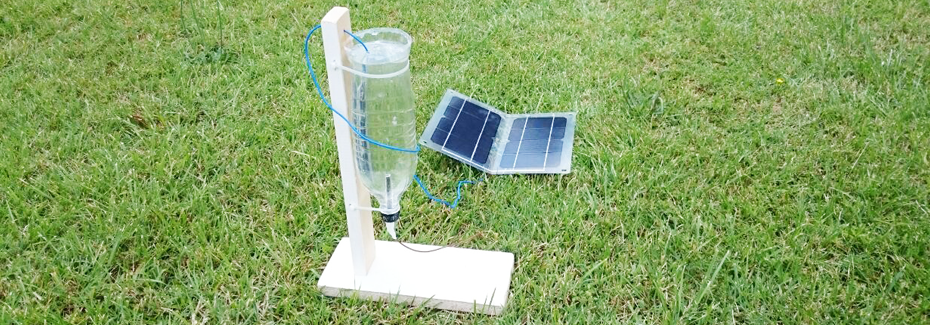
How to build the solar kit to produce Sodium Hypochlorite
The process to make the kit is quite easy:
- Cut a plastic bottle and secure it to a wooden support or other material, which allows a vertical position of the same.
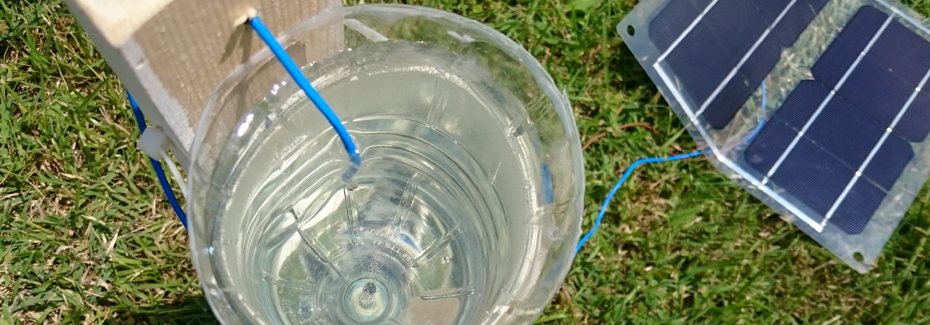
- Attach a copper wire to graphite anode and place it in the plastic bottle cap.
- Remember to waterproof the hole with melted wax or with silicone.
- Create watertight connectors between the wires of the electrodes and the solar panel (minimum output of the solar panel should be 6 Volts at 1 Ampere).
- Put the solution of water and kitchen salt in the kit bottle and place it at sunlight.
- Immerse the copper wire of the cathode in the solution.
- Wait 2-8 hours and control concentration you need in the solution.
Video Tutorial: How to make Solar Kit for Water Purification
The kit and the tutorial was developed by GESTA and Geographical Research Association for Tregoo's Charity Program, to support the needs of the disadvantaged countries, where not potable water continually reaps victims.
Spread this video to allow the construction of the solar kit everywhere in the world.

